Now that book 3 is off into the world, I finally have some time to have a little fun with my nail polish again! I thought this would be the perfect opportunity to show off both a new color and the second technique for creating a glitter gradient.
I’ll start with the glitter gradient. I love using this particular technique because it is both simple and super cost-effective. Here are the items you’ll need: clear nail polish, glitter, and a paint brush.

The paint brush can be any sort of fine-fiber brush. I had an extra eye shadow brush from an old makeup kit that I had never used. For the clear polish, I use my base coat. And for glitter, any micro-glitter from the craft store will do. This time, I’m using a pink holographic glitter from a 6-chambered jar of holographic glitter I found at Hobby Lobby. I bought it 5 years ago and am in no danger of running out anytime soon.
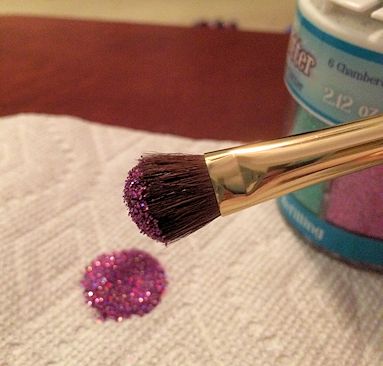
To apply the glitter to your nails, start out by applying base coat as normal. Let it dry completely, then apply a second coat over the top half of the nail. While the polish is still wet, dab the makeup brush in the glitter and then tap it gently above the wet polish.

To get the gradient effect, tap the brush while holding it over top of the nail, allowing the glitter to rain down in a fine dusting. After that, refill the brush and gently press the glittered end against the top part of the nail to fully cover the tip. After that, top it off with a layer of top coat (or two, if you like a smooth finish). Quick and easy.
If you have trouble getting the glitter to rain down evenly to achieve the gradient, you can practice tapping the brush over a piece of paper until you get a feel for it.
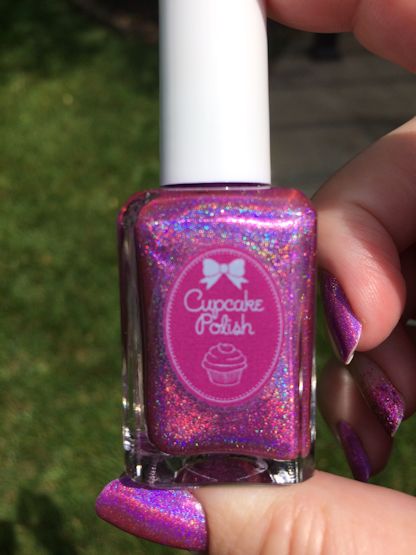
For this week’s nails, I applied the glitter gradient to one finger on each hand and then painted the remaining nails with Chicago, a gorgeous pink holographic polish by Cupcake Polish.
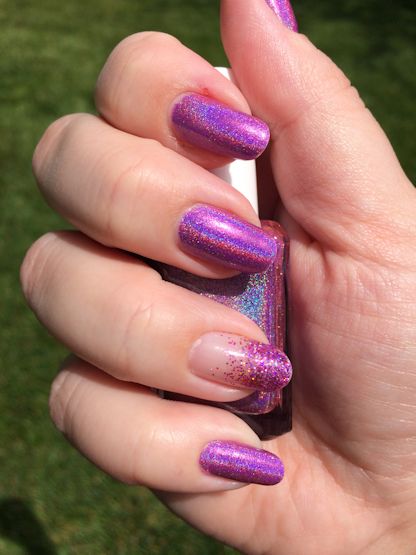
And here’s the final look!

