As promised a couple of weeks ago, this is the first of the biweekly nail polish-oriented posts I’ll be making. I thought I would start with one of my favorite looks, the glitter gradient. I actually have two different techniques for doing the glitter gradient: the first uses two different colors of nail polish, the second uses loose micro glitter. Today I’ll show the technique using two colors of polish, and I’ll do one another day with the loose glitter. Let me ask in advance that you ignore my very short thumbnail. An unfortunate incident involving a tumbling tower of Tupperware led to an unrepairable break. Perfect timing. 😛
Without further ado, here’s how I do a glitter gradient:
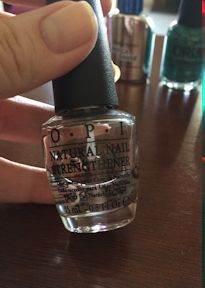
I always start with base coat. This is really important because it not only helps the polish better adhere to the nail, but it also provides a barrier to prevent the color from staining your nail. Instead of using regular base coat, I like to get an extra strengthening benefit by using OPI Natural Nail Strengthener.

For the color, I’m using Essie Blossom Dandy. It’s hard to photograph, but the shade is a pastel aqua/mint green creme. It covered my nails completely in two coats. The consistency of this one is pretty thin and it has a tendency to run off the edge of my nails no matter how carefully I apply it. But that’s ok, because I have a secret weapon.

What’s my secret weapon? The Essie nail corrector pen. Pretty much every brand makes a nail corrector pen. In my experience there is very little difference regardless of which one you buy. Now, some of you may be saying to yourself, “I’ve used one of those before and it doesn’t work well.” If you’re using it the way it’s designed to be used, I totally agree with you. For those that aren’t familiar, the pens have a reservoir of acetone inside and an absorbent tip. In theory, there would be sufficient acetone absorbed in the tip to wipe away any polish that gets on the skin around the nail. But I’ve always found the tips to be too dry to work well.
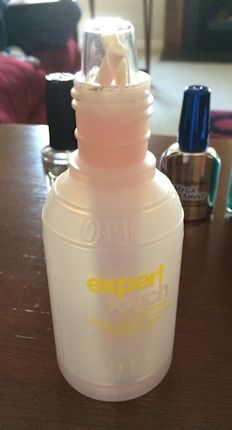 So I improvised and found a method that works really well. I had a small, empty bottle of nail polish remover that just happens to be the right height for the corrector pen. I poured in enough remover to cover the bottom about 1/4″ deep. This is just enough to cover the tip of the nail corrector pen.

When I need to use it, I pull out the pen, tap off the excess acetone onto a paper towel, then trace the tip over the rogue polish. I recommend checking after each nail. Since wet polish dissolves more readily than dry, doing it after each nail makes for a quicker and easier process. I clean the tip by wiping it across the paper towel and then drop it back into the bottle until I need it again.
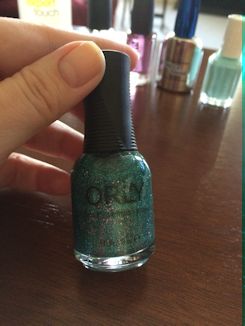
After applying two coats of the base color to each nail, it was time for the glitter. Here, I used Orly Steal the Spotlight. It’s a green micro glitter with sparse flecks of pink glitter mixed in. It is just a few shades darker than the Essie Blossom Dandy, so it makes for a nice contrast while staying in the same color family.
The trick for glitter gradients is to create the gradient using multiple, thin coats. For each coat, you want to have barely any polish on the brush. Too much and the coat will be too dark. Too little and you’ll drag lines into the base color. It takes a bit of practice to get a feel for how much is the right amount to have on the brush. One rule of thumb is that if there is enough polish to form a bead at the bottom of the brush, then you probably have too much.

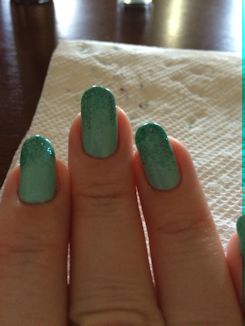
Start applying the glitter coat by lightly dabbing the brush on the top part of the nail. There’s two reasons why I do this: first, if there is any excess on the brush, it will come off here where the glitter is meant to be heaviest anyway and second, I can use this spot to lightly re-wet the brush as I work. I like the gradient to come about halfway down the nail, so I apply the polish by touching the brush about midway down my nail and gently dragging it toward the tip. The first coat should look pretty thin. Use the same technique for the next coat, but instead of starting with the brush midway down the nail, start with it slightly closer to the tip. As each subsequent layer of glitter is applied, you move your starting point closer and closer to the tip of the nail. In the end, the top of the nail will have more layers of glitter, which will naturally result in a gradually increasing opacity.

I finish my nails using two layers of top coat. For the first top coat layer, I use CND Super Shiney (that’s not a typo, that’s how they spell shiny on the bottle). I like it because it is quick drying and rapidly seals the polish beneath. With this top coat, my nails will be smudge-proof within about 10 minutes. They’ll still smear or scratch if they come in contact with something rigid (for about an hour), but I can do light tasks like use the computer, play video games, or read a book without worrying.

For the second layer of top coat, I use Sally Hansen Mega Shine. I’ve used this on my nails since I was in high school and I love it. Love it. This is the glossiest, shiniest top coat I have ever tried, plus it dries quickly too. The combination of this with the CND Super Shiney makes my manicure last 1.5-2 weeks without chipping. I should note that I don’t claim this combo to be a silver bullet for chip resistance. It works like a charm for me. I’ve tried it on my mom and aunt and it has a tendency to make the polish peel off of their nails as one solid layer (which makes removal super easy, though the timing is unpredictable XD). I think it may work best on those who keep their nails painted consistently and therefore don’t have a lot of natural oils built up on the nail itself. I also keep my nails buffed, but I only do a dull buff rather than smoothing a gloss. Perhaps the added surface roughness gives an extra oomph of mechanical adhesion for my nails. Regardless, I would recommend either one of these top coats on their own too.
In two weeks: a holiday manicure with crystal accents!
As a final note: there are still a few hours left to get a free Ebook copy of Reflection: The Stranger in the Mirror on Amazon! Here’s the link: http://www.amazon.com/dp/B00XGYO2C4


Coool
LikeLiked by 1 person
^_^
LikeLiked by 1 person