
It’s time for the biweekly nail polish Sunday once again! Since it’s a festive season, it’s a perfect time for nails decorated with crystals. Because everything is better with Swarovski crystals. (Except food, that would be too crunchy.)
A manicure with crystals looks fancy and certainly seems like it would be expensive, but if you can do it yourself it’s significantly cheaper. Once you have the supplies, they last for years worth of manicures.
Here are the supplies needed:
Tweezers
Nail polish for basic manicure
Swarovski crystals in 7ss and 5ss size. The best price I found was from this seller on Amazon–I got them in a variety of colors in sizes 7ss and 5ss in 2010 and still haven’t run out. A quick note on size: the lower the number the smaller the diameter. Sizes 7ss and 5ss seem to work best for nail art.
Crystal flipping tray (on Amazon) This isn’t strictly necessary, but it helps a lot by making it easy to turn the crystals face up. All you have to do is pour the crystals in and gently shake the tray side to side. When the crystals hit the walls, they flip right-side up like magic.
Silver micro beads. You can buy them specifically packaged for nail art, or you can find them for just a couple of dollars at your local art supply store. They can usually be found in the same aisle as the bottles of glitter.
Flatback faux pearls. I got mine from Sephora. They also last virtually forever. Ciate mini paint pot with pearls
How to:
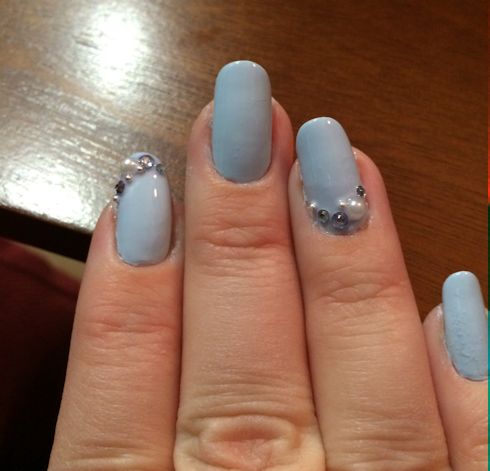
Step 1: Apply nail color of choice as you normally would, but stop before applying top coat. In this case, I’m using a pale sky blue from Zoya called Blu.

Step 2: Apply each crystal, one by one.
 Start by putting a small drop of top coat onto the nail in the location you want to put the first crystal.

Use the tweezers to grab one crystal (or pearl in this case) and place it over top of the drop of top coat. Place the next drop and apply the next crystal and so on.

When applying a cluster of crystals, I prefer not to decorate all of my nails since it can look overwhelming. So I tend to do just the index and ring finger and apply the crystals as an arch either at the top or bottom of the nail.
Step 3: Once all the crystals are in place, brush over the whole nail–crystals and all–with top coat. Be careful to apply the coat evenly, as it tends to pool around the crystals. If this happens, you can redistribute the polish easily while its still wet by gently pulling the excess away with the brush.
And that’s it–with just a little patience and not a lot of money and your nails can be sparkling and bright for the holidays!
PS- As a side note, if you aren’t up for applying each crystal individually, you can always buy pre-made stickers in the nail polish supply section of most beauty stores. The upside is that they are super easy to apply–just peel and stick. The downside is that they are one-time use and relatively costly, and the sticker is visible and peels up after a day or two. But they are a quick and easy alternative for a special night!


Hey! I like that 🙂
LikeLiked by 1 person
Thanks! ^_^
LikeLiked by 1 person